We had to lay out the driveway in 3D space on the lot to determine the location and depth of the footings for the planter block wall we are putting in. In doing so, we had to consider an number of different things like, the flow of any surface water should the permeable pavers get saturated, the level at the street, and the level at the garage and what slope we wanted down from there.
First, consider our driveway. It is rather long, with a parking space and a hammer head (for backing in and turning around) at the end.
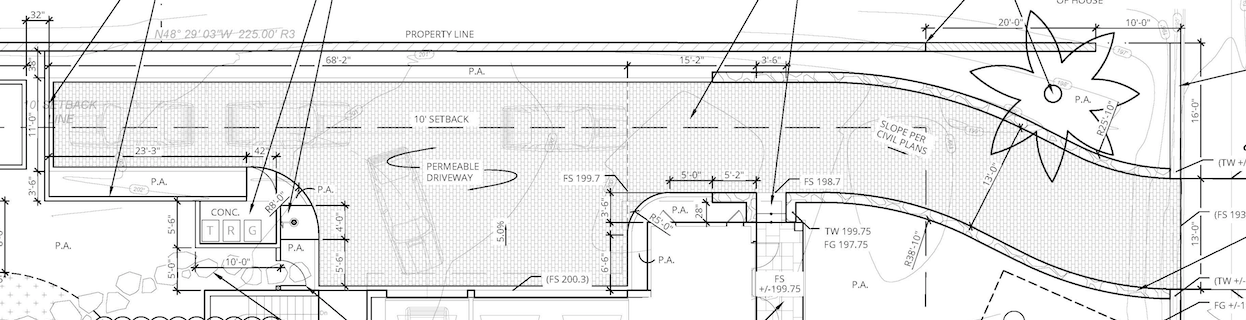
We knew that we wanted the end of the hammer head / parking space to be the highest point on the driveway, so water would flow down toward the street. We also made an assumption that water from both side would flow toward the center and we decided that the center would be measured as the point in the middle of the driveway at the front of the house.
We also knew that we wanted to have the back of the driveway hammer head be the same level as the back porch, as that is the level our pool deck will eventually be, and the driveway ends up pretty close to the pool deck.
The next requirement is that the part of the house that is closest to the back of the driveway has shingles that go down fairly low down the side of the house, with plaster below.

The driveway at that point (or ground, as the driveway comes in just at the back of the doorway) has to be below the bottom of the shingles. As a starting point, the stone surface at the doorway is the same level we are starting with at the back of the driveway.
A typical slope for a driveway is 1/8″ or 1/4″ per foot. We measured at point parallel to the first point we marked in the driveway, and equidistant from the house, at the point of the doorway, put a stake in it, and marked the same level as our starting point.
To get the fall to that point, we simply multiplied 1/8″ (for starters) per foot time the number of feet between the stakes, and that gave us the level of the driveway at that point, which is about 32 feet from the first point, or about 4 inches below the level of that point. But at that point, we are fairly close to the center of the driveway, which is the lowest point from side-to-side. To determine the level at the door opening, we again have to measure the distance (14 feet) and multiply it by 1/8″ and add that to our 4″ down, to get the level there. Unfortunately, at 1/8″ per foot, that puts us 2 1/4″ down from our reference point, or pretty much at the level of the bottom of the shingles. That isn’t low enough.
Switching from 1/4″ per foot fall from 1/8″ per foot, puts us 4.5 inches down from the top of the stone surface at that doorway, which is just about perfect.
But, we now need to see where that puts us as we go down the driveway.
Marking a third point, also in line with the other two, at the end of the house (and at the point where the driveway really starts dropping towards the street, we measure 57 feet away from our second point, or, another 14.25″ drop from that point. Adding that to the 8″ original drop at the second point, we get a total of 22.25″ down from our reference line (which also happens to be the level of the porch at the out at the front). We are 28″ from the side of the house at that point, so we subtract a half an inch up (for the side-to-side slope) and we get a level of 21.75 at the house at that point.
That is just about perfect, as that is the current level of the dirt at that point, and about where the stone cladding on the house ends.
So, 1/4″ per foot fall works fine.
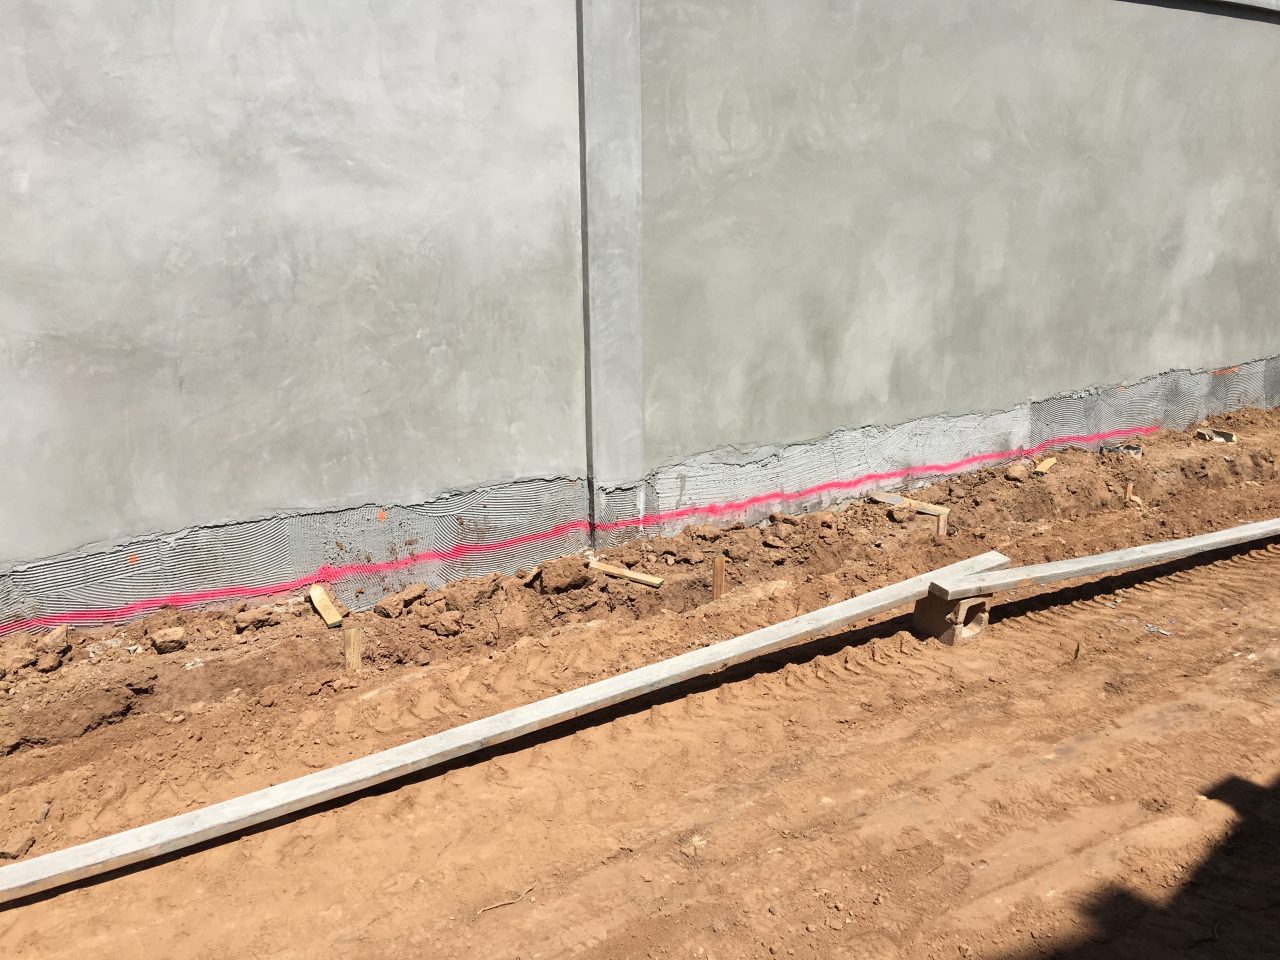
Once we had all that, we projected those three levels, adjusted for the distance to our retaining wall we are putting in 3 feet from the first one we put up on the property line, and marked them on the first retaining wall. We then used a piece of string to pull a tight line between all the points, and threw some construction paint on it to mark the driveway level.
Now the block wall contractors have a measure for where the footing needs to go, which is 14″ below the top of the driveway.